

How do I use the Touch Bar feature on my MacBook Pro? Can I customise the functions that appear on the Touch Bar?
When Apple updated the MacBook Pro in 2016 foremost among its list of upgrades and new features was something called the Touch Bar, a thin touchscreen display sitting along the top of the keyboard in place of the function keys. The company has since launched updated MacBook Pro models for 2017 (covered here: MacBook Pro 15-inch 2017 review and MacBook Pro 13-inch 2017 review), and these retain the feature.
In this article we show how to use the Touch Bar on these MacBook Pro models: including how its functions change for various commonly used apps, and how to customise the Touch Bar so it displays and performs exactly the functions you want.
Which Macs have a Touch Bar?
The Touch Bar is only available on certain models of the 15-inch and 13-inch MacBook Pro from 2016 and 2017.
These include these current 2017 models, which you can buy here.
- 13-inch, 3.1GHz dual-core 7th generation ‘Kaby Lake’ processor, 256GB Storage, £1,749
- 13-inch, 3.GHz dual-core 7th generation ‘Kaby Lake’ processor, 512GB Storage, £1,949
- 15-inch, 2.8GHz quad-core 7th generation ‘Kaby Lake’ processor, 256GB Storage, £2,349
- 15-inch, 2.9GHz quad-core 7th generation ‘Kaby Lake’ processor, 512GB Storage, £2,699
And these 2016 models, which you may find secondhand or on Apple’s refurbished store
- 13-inch, 2.9GHz dual-core 6th generation ‘Skylake’ processor, 256GB Storage, was £1,749
- 13-inch, 2.9GHz dual-core 6th generation ‘Skylake’ processor, 512GB Storage, was £1,949
- 15-inch, 2.6GHz quad-core 6th generation ‘Skylake’ processor, 256GB Storage, was £2,349
- 15-inch, 2.7GHz quad-core 6th generation ‘Skylake’ processor, 512GB Storage, was £2,699
A new MacBook Pro model could include an updated Touch Bar. Read: Apple Patents Force Touch for MacBook Pro Touch Bar.
Read next: Mac buying guide 2017 | Best cheap MacBook Pro deals UK

Touch Bar tips
There are lots of ways in which the Touch Bar can simplify tasks you frequently do on your Mac. One of our favourites is the ease at which we can correct spelling mistakes, just by tapping on the correct word. Find out some of the things you can do with the Touch Bar below, including some features that it brings to specific apps.
How to use the Touch Bar to unlock your Mac
- When you set up a new MacBook Pro with Touch Bar you will have the option to add your Fingerprint which can be used as a form of ID to unlock the Mac, to confirm your identity for iTunes purchases, or for use with Apple Pay
- You can also add fingerprints at a later date by going to System Preferences > Touch ID
- Select Add a Fingerprint and touch the small square area beside the Touch Bar while the integrated camera captures your fingerprint
- Now when you open your Mac you won’t need to enter your password, you will only need to rest your finger on the Touch ID pad
How to use Apple Pay on the MacBook Pro
- If you have set up a Fingerprint to be used to unlock your Mac, as per the instructions above, you will also be able to use it to confirm your identity for paying with Apple Pay, for example, when purchasing something from Apple’s web store (not many UK sites have integrated Apple Pay as yet)
- You will need to update your Apple Pay Preferences and have your Mac verified with your bank before you can use it to pay with Apple Pay
- We explain how to set up Apple Pay on the Mac here
How to turn on the Touch Bar
- The Touch Bar will usually show the Control Strip (Escape, Brightness, Volume and Siri) at all times, but some times after you have been inactive for a while it will switch off or dim
- Just touch the Touch Bar and those options will appear
- If the Touch Bar is still unresponsive try selecting a different app and then returning to the one you were using
How to customise the Control Strip on the Touch Bar
- Open System Preferences > Keyboard
- Click on Customise Control Strip
- The existing Touch Bar icons will jiggle about
- Drag and drop new icons to the Touch Bar, such as Spotlight search
How to add favourite apps to the Touch Bar
We would love it if we could add favourite apps to the Touch Bar, or have the Touch Bar mirror the Dock, but as yet it isn’t possible.
How to adjust brightness using the Touch Bar
- There is a set of Touch Bar options that are available at all times, Apple calls them the Control Strip – Brightness is one of these
- Tap on the icon that looks like a sun
- A slider will appear on the Touch Bar, touch it and move your finger until the screen brightness is as you desire it
How to adjust volume using the Touch Bar
- The shortcut to Volume controls is also found in the Control Strip section of the Touch Bar
- Tap on the icon that looks like a speaker
- Use the slider to turn the sound up or down
- To mute sound just tap on the icon which shows a speaker with a line through it
How to open Siri using the Touch Bar
- One of the best things about the Touch Bar is that there is a Siri button (something we wish was present on all Apple keyboards)
- Tap on the Siri icon (the circle with a wave form inside) and ask Siri your question
Where are the keys for Mission Control, Launch Pad, etc on the Touch Bar
- The system controls you’d normally find along the top of a standard Apple keyboard, including: Mission Control, Launchpad, and media keys including play, pause, back and forwards don’t appear on the Touch Bar by default
- To view these handy keys, tap the
How to use predictive text with the Touch Bar
- In many Apple apps Predictive Text suggestions will appear in the Touch Bar while you are typing
- If you aren’t seeing these suggestions tap on the Keyboard icon beside the Control Strip
- You can tap on a word to automatically add it to your document or email
How to correct spellings using the Touch Bar
- If you have misspelled a word select the word with your mouse or track pad
- You will also see suggestions of the correct spelling in the Touch Bar
- Tap on the correct spelling to automatically change the word in your text
How to format your text using the Touch Bar
- If you have the predictive text suggestions showing in the Touch Bar you can minimise this to view more formatting options
- Click on the > arrow beside the first suggested word
- You will see options for changing the colour of text, bold, italic, underline, justify right, left and centre, and bullets and numbering options
How to add emoji using the Touch Bar
If you tap the smiley face in Mail (or in Messages, for that matter), Touch Bar transforms into a swipeable menu of emoji: most frequently used, by default, but you can tap the button on the left to select a different menu of images. Tap the emoji you want to include in your message.
- You can add emoji from the Touch Bar in Mail and Message
- In those apps you will see a smily face icon on the left side of the Touch Bar
- Tap on the Emoji icon to see a selection of frequently used Emoji
- Tap and swipe across the Touch Bar to see more options
- Tap on the one you want to add it
- If you want to search for an Emoji, tap on the magnifying glass icon and type in your search term
- The best match Emoji will appear on the Touch Bar

How to see Function keys on a Touch Bar MacBook Pro
The Touch Bar replaces the row of Function keys, but don’t worry: it’s easy to bring them back.
- Press and hold the Function (fn) key on the bottom left of your keyboard to make the Fn keys appear
- As soon as you let go of the key the F keys will vanish

By default, the Fn button brings up the Function keys on the Touch Bar. However: if you open the keyboard section of System Preferences and explore the options related to the Touch Bar, you’ll see that you can customise what the Fn button does. Jump to the section where we discuss customisation options if you want to change what the Fn button does to the Touch Bar.
How to get the Escape key on Touch Bar
This depends on which app you’re using. In most of the main apps Esc is present on the far left; this includes Photos, Mail, Safari and Keynote. If the app you’re using doesn’t include Esc, check the customisation palette and see if it’s available to add so that it shows up in that app in future.
At any time, too, you can click somewhere on the desktop and the Touch Bar will revert to its standard default layout, which includes Esc. It’s also possible to reassign one of the hardware keys to act as Escape on a system-wide level.
- Open System Preferences and select Keyboard.
- Select the Keyboard tab and click Modifier Keys at the bottom right.
- Below the keyboard dropdown (make sure you pick the right one), you should see a list of four keys: Caps Lock, Control, Option and Command.
- We’d avoid reassigning Control, Option or Command and opt for reassigning Caps Lock as you can achieve the same effect by typing while holding the Shift key.
- Whatever your decision, select the key of your choice and select Escape from the drop-down window.
- Click OK to save your preferences.
Read more: How to get Escape key on new MacBook Pro with Touch Bar
How to see a Quick Look preview using the Touch Bar
- Select a document, image or video file (from the Finder, on your Desktop, or in a Folder)
- Tap on the icon that looks like an eye that appears in the Touch Bar
- The Quick Look Preview will appear
How to Share a document or image using the Touch Bar
- Select a document (from the Finder, on your Desktop, or in a Folder)
- Tap on the icon that looks like an square with an arrow sticking out of it that appears in the Touch Bar
- The Share options will appear in the Touch Bar
- Choose from Mail, Messages, AirDrop, Notes, and more
- To access extra options touch and swipe the Touch Bar until you find the option you want, e.g. Facebook, Twitter, Add to Photos, and more.
How to Tag a document or image using the Touch Bar
If you use Tags to make it easier to find documents you can easily add them using the Touch Bar
- Tap on the icon that looks like a gift tag
- Choose from the Tags you have already set up (you can select multiple Tags)
- To add a new Tag, tap on the three dots (…)
How to sort items in the Finder using the Touch Bar
- If you want to change order of items you are viewing in the Finder, perhaps sort them by date so you can see the most recent, you can do so by tapping the icon that looks like four boxes (which appears by default if you currently have the Finder set to show icons)
- On the Touch Bar you will now see four options for the different views, plus options for Sort By Name, Kind, Date, and if you swipe across Date Last Opened, Date Added and so on.
Safari
The Touch Bar’s default function set in Safari features back and forward buttons, a ‘new tab’ button and a set of thumbnails showing the tabs you currently have open – it’s very easy to switch between open tabs by swiping across this section of the bar.
How to use the Touch Bar to jump to your frequently visited websites
- When you are in Safari Safari specific options will appear on your Touch Bar
- When you open a new Safari window, or click in the URL bar, you will see icons or the names of the sites you visit frequently (those that appear in Favourites)
- Tap on the one you wish to open, or tap and swipe across to see more options
How to use the Touch Bar to move between the different Safari website tabs you have open
- If you have multiple tabs open in Safari you will see small thumbnail sized images of the screens in the Touch Bar (you can see thumbnails of more than 27 websites, but we have to say by the time they are that small it’s not really usable)
- When you have a lot of windows open it will gather pages from a particular website together under one tab
- To jump to the site you wish just tap on the representation of that web page

How to Navigate using the Touch Bar in Safari
- When you are using Safari if you want to go back to the previous page rather than clicking on the back arrow in the menu at the top of the page you can tap on the back arrow in the Touch Bar.
- Similarly you can tap the forward arrow to go forwards through the pages you have been browsing
- Tap the icon that looks like boxes with an + in the middle to open a new tab
How to Search via the Touch Bar in Safari
- Tap on the icon on the Touch bar that looks like a magnifying glass to search in Safari
- The curser will jump to the url bar and you will be able to type in your search term or the URL if you know it
How to customise the Touch Bar in Safari
- You can customise the Touch Bar in some Apple apps, including Mail and Safari
- In the menu choose View > Customise Touch Bar
- The screen will dim and you will see various options that you can drag from the screen onto the Touch Bar
- The icons on your Touch Bar will start to jiggle about
- You can drag an Add Bookmark option, a Reader shortcut, Favourites Bar, New Tab and more, onto the Touch Bar – the existing icons will shift across to make room – however, you are limited as to how many of these custom options you can add

How to use the Touch Bar to skip YouTube adverts
An eagle-eyed Reddit user had spotted an additional function of the Touch Bar in Safari. He wrote: “In Safari, the [Touch Bar] will pop up a scrubbing control whenever a video begins to play,” writes RomansFiveEight. “Amazingly, you can use that to scrub THROUGH an ad, even a non-skippable 30 second pre-roll ad; and begin your video right away!”
Unfortunately this feature didn’t survive for long, currently the scrubbing feature, that lets you move through the content quickly, is missing from YouTube.
Read more: MacBook Pro 2016 not working: How to fix MacBook Pro hardware problems
Mail is a really strong example of the Touch Bar’s power, essentially bringing the convenience of iOS’s QuickType predictive keyboard to Mac. As on iPhone, suggested words and emoji appear just above the keyboard, enabling you to rattle out emails more quickly. There’s also, inevitably, an emoji button.

How to use the Touch Bar to reply to emails in Mail
- It is possible to tap on the Touch Bar to reply to an email you have selected in Mail
- Unfortunately it will default to reply all, if you just wanted to reply to the sender you will have to use the onscreen controls
How to delete an email using the Touch Bar
Your ability to ‘delete’ depends a little on your email settings and the email service you use. However, you should be able to delete (or at least archive emails) by following the following directions.
- Select the email you wish to delete
- Tap on the icon of the box with an X in the middle and an arrow
- This will either delete the email, or move the email into the Archive
How to customise the Touch Bar in Mail
You can customise the Touch Bar in some Apple apps, including Mail and Safari
- In the menu choose View > Customise Touch Bar
- The screen will dim and you will see various options that you can drag from the screen onto the Touch Bar
- The icons on your Touch Bar will start to jiggle about
- You can drag an Include Attachments icon and a Markup icon onto the Touch Bar – the existing icons will shift across to make room – however, you are limited as to how many of these custom options you can add
Photos
Photo’s default feature set is dominated by a swipeable gallery of image thumbnails: handy for rapidly jumping to the image you want to work on. Like Safari, Photos also includes the volume and Siri buttons at the right.
On the left there are some interesting buttons, including a button to Like an image in your library and an edit key: tap this and the Touch Bar changes entirely. Now you’ve got crop, auto edit and other editing functions. Our favourite is the rotation tool in the centre: swipe this to rotate the image to your preference. Tap Done to go back to the default Photos Touch Bar layout.

How to quickly find photos using the Touch Bar
- In Photos you can quickly swipe through all your photos to find the one you need using the Touch Bar
- If you are looking for photos from early 2017, just swipe until you reach the beginning of the year
How to Favourite a photo from the Touch Bar
- If you like a photo you can Favourite it from the Touch Bar just by tapping on the heart icon
How to rotate photos using the Touch Bar
- You can rotate a photo (or multiple photos) from the Touch Bar just select the images you want to rotate and tap the rotate icon
How to edit a photo using the Touch Bar
- Select the photo you wish to edit
- Tap on the edit icon (the one showing three sliders)
- Choose from Navigate, Crop, Filters, Adjust, Retouch, and Red-eye
- Tap on one of these options and tap and drag on the slider until you achieve the effect you desire
- To return to select another tool, tap on the same icon which will now show a > besides it
How to use the Touch Bar to see the before and after on an edited photo
- Once you have edited your image you can view previous version and compare it by taping on the icon that shows a white and black box
iTunes, iMovie & Final Cut Pro
Use the Touch Bar controls when playing movies
There are Touch Bar controls for Play, Pause, as well as Rewind and Fast Forward these can be used in movie playback as well as for music
- You can also swipe across the Touch Bar to skip through movies and TV shows
- It enables you to be a little more precise than using the curser to locate a particular frame
- You can also select Subtitles from the Touch Bar
Use the Touch Bar to scrub through video in iMovie
As with iTunes, you can use the Touch Bar to scrub through video for easier editing
How to use the Touch Bar in Final Cut Pro X
- You can scrub through video quickly using the Touch Bar
- There are options for Import, creating a New Event or a New Project
- You will also find editing tools including Trim tools and audio tools
- Learn more here https://support.apple.com/kb/PH26494?viewlocale=en_US&locale=en_US
Maps
The default App Controls for Apple Maps are very simple. You just get icons for restaurants, cafes, shops and cinemas: tap one of these and Maps will run a search for nearby businesses answering that description.
Once you get stuck into Maps, however, the Touch Bar becomes far more interesting. Select any of the businesses found in that initial search, for instance, and you get a button to bring up directions to it, as well further controls to go to the firm’s website, call (don’t worry – a further confirmation is required before the call is actually placed through FaceTime audio, so you’re unlikely to call by accident), favourite (or unfavourite) it, get more information and (very usefully) send the details to a contact.

How to use the Touch Bar to find nearby restaurants and cafes in Maps
- Tap on the Restaurant or Cafe icon (there are also icons for cinemas and shops)
- If you can’t see the icons, tap on the Search bar in the centre of the Touch Bar
- You can then get driving directions to the location by tapping on Directions
- Once you have the Driving directions you can switch to Walk or Transit
How to search for an address in Maps using the Touch Bar
- Tap on the search bar and either type in the location
- Once you have added the location you can choose to obtain driving directions
- You can add it to Favourites by tapping on the heart icon
Notes
How to start a new Note from the Touch Bar
- Once you have opened Notes you will see a new note icon in the Touch Bar
- Touch that to start composing your new note
How to create a list in Notes using the Touch Bar
- Tap the icon for creating a check list
How to customise the Touch Bar in Notes
You can sort of change the Touch Bar controls in Notes, but currently there aren’t any additional controls to add – so all you’ll be doing is moving the controls around, removing ones you don’t like (you can turn off typing suggestions here), or adding spaces between them.
- Open Notes and select View > Customize Touch Bar
- Drag-and-drop the controls you want into the positions where you want them

Calendar
How to check appointments in your Calendar using the Touch Bar
Open the Calendar app
- Tap on Today to see today’s appointments
- Tap on next month to see what you are doing next month, and so on
How to edit an event to the Calendar using the Touch Bar
- Select the event you wish to edit
- You can change the calendar it’s associated with (if you have more than one calendar set up)
- You can add the location
- Tap on Time to change the time
- Tap on Invites to add invites
- Unfortunately it isn’t possible, yet, to create a new event directly from the Touch Bar
FaceTime
How to answer phone and FaceTime calls with Touch Bar
- The Touch Bar will change dynamically if the Mac detects an incoming FaceTime or phone call (on a linked iPhone, in the latter case)
- Simply tap the green Accept button to take the call, or the red Decline if you’re not interested

How to make a FaceTime call using the Touch Bar
It’s sort of possible to initiate FaceTime calls from the Touch Bar, but you have to set it up so the correct contact is displayed there. As long as you have previously called that person from FaceTime on your Mac you can start a call from the Touch Bar.
- Open FaceTime and a link to the person you called most recently will appear in the Touch Bar
- Unfortunately it only shows the person who is selected but you have the option of calling, texting or emailing that person directly from your Touch Bar
- Once the FaceTime conversation starts, the Touch Bar changes: it shows how long the conversation has lasted, and gives you options to end the call or mute audio.
How to customise the Touch Bar
It’s pleasingly intuitive to customise the functions that appear in the Touch Bar. In fact, it operates essentially like the Dock in macOS or iOS – you just drag functions down to it and they’ll appear there instantly. Bear in mind, however, that this is done on an app-by-app basis, and Apple says only that “some apps” allow you to customise the way Touch Bar works.
First of all, let’s look at some global settings and preferences for the Touch Bar.
How to display App Controls, Control Strip or both
Open System Preferences then open the Keyboard section. Make sure you’re in the Keyboard pane – the word Keyboard on the left should be highlighted in blue. You’ll see two dropdown option menus in the centre which relate to the Touch Bar: ‘Touch Bar shows’ and ‘Press Fn key to’.

In the first of these dropdowns, ‘Touch Bar shows’, you get to decide on a global level whether the Touch Bar will show just App Controls (the functions specific to the application you’re using), just an Expanded Control Strip (brightness and volume controls, media buttons and the like), or – the default choice – a mixture of the two.
Customise what the Fn button does to the Touch Bar
The lower of the two Touch Bar-related dropdown menus in System Preferences > Keyboard, ‘Press Fn key to’, selects what the Fn key will do to the Touch Bar. The default here is to bring up the Function keys, but if you selected ‘App Controls’ or ‘App Controls with Control Strip’ in the menu above, you can make the Fn key show or expand the Control Strip. And if you selected ‘Expanded Control Strip’, you can make the Fn key show the app-specific controls.

I’ve made that sound complicated. Basically, the Fn key can be made to display either the Function keys, or whichever Touch Bar element you didn’t pick as the default.
Customise controls that the Touch Bar displays for each app
Now let’s look at how to customise the controls and icons that the Touch Bar displays for each application.
Selected apps will let you bring up a palette of functions onscreen – and you do this within the app itself, not in System Preferences.
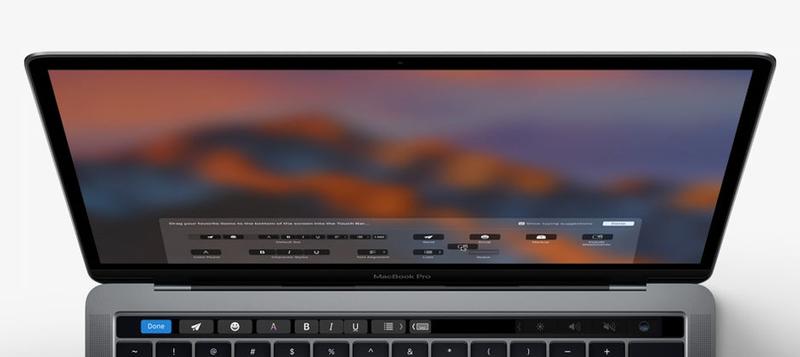
Open Finder, for instance, then select View > Customise Touch Bar, and you’ll see the options below. All you need to do is click-and-drag your chosen function down to the bottom of the screen, whereupon it will appear in the Touch Bar. The existing controls will wobble very slightly to indicate their are open to editing – just like app icons in iOS when you’re moving apps around.
To change the Touch Bar controls in other apps, open each app in turn and find the option to customise the Touch Bar. It won’t necessarily be located in the same section of the menu as in Finder, but looking under View, or in the app’s preferences, would be a good place to start. Remember, however, that not all apps allow Touch Bar customisation.
Make sure you’re customising the right set of controls
Bear in mind, finally, that you need to make sure your chosen app is displaying the default Touch Bar controls at the moment you select the customisation option, and hasn’t switched to some other set of controls because of an unusual context; otherwise you’ll just customise the controls for that context, not for general use of that app.
We tried to customise Touch Bar in Safari, for instance – more on that in a moment – but initially made the mistake of doing this while open on a tab running Gmail with a new email currently being composed. So the Touch Bar was displaying QuickType suggestions, emoji and things like that, rather than the normal Safari controls. And when we opened the customisation menu, it tried to change those controls.
Security
At the 2017 Pwn2Own hacking contest, two participants named Samuel Groß and Niklas Baumstark were able to hijack the Touch Bar display on a MacBook Pro and make it display the following witty message:

We understand that Groß and Baumstark were able to access the display through a flaw in Safari which allowed them to gain root control of macOS.
It probably isn’t worth worrying about – any hacker who has access to your Mac and the skills which would let them break into the Touch Bar can do a lot more damage than displaying a funny message, and Apple will plug the flaw in a software update – but it’s an interesting and impressive demonstration.
Author: David Price, Editor, Macworld

David has been writing about technology for well over two decades, and got on board the Apple hype train when covering the original iPhone launch in 2007. He is an enthusiastic Apple Watch evangelist and feels that the HomePod is misunderstood.